# GUI overview
This document will show and explain all parts of the user interface offered by Aura.Connect
# Login
The very first part of the user interface that every new user of Aura.Connect will see is the Login screen
Although this UI element may be self explanitory, let's still go through its main parts
# Sign in
The sign in screen allows you to perform authentication using your Aura.Connect credentials
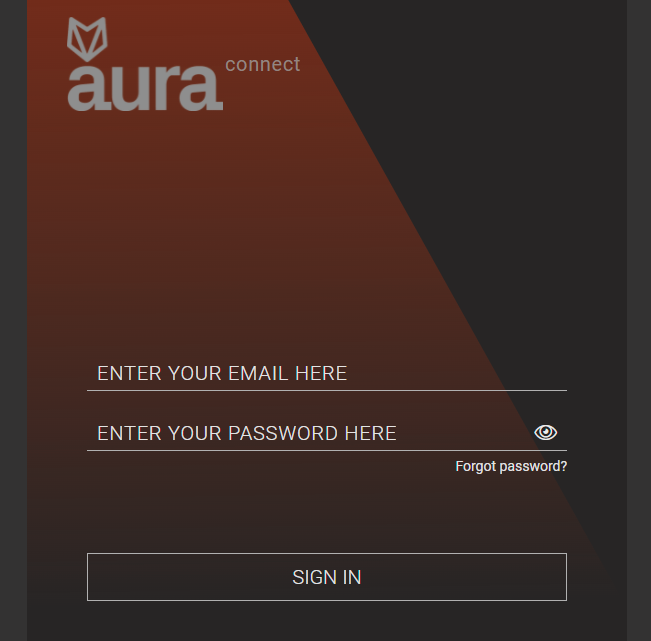
To authenticate enter your email in the first field and your password in the second field, then click the 'Sign In' button
# Forgot password
On the Sign in screen, there is the 'Forgot password' button, which brings you to the forgot password screen, which looks like this
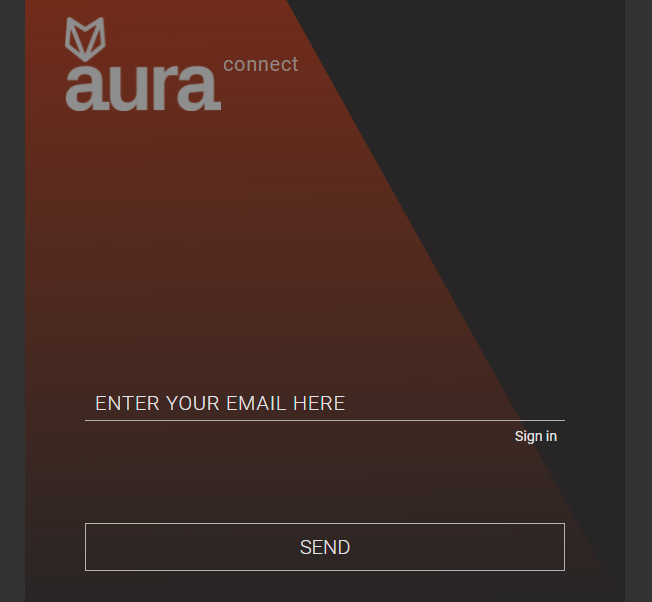
Here you will be able to reset your password, if you happen to forget it. All you need to do is enter your email in the field, then click the 'Send' button
Shortly after you will receive a password recovery code on your email, which you can use to set a new password for your account in Aura.Connect
WARNING
Password recovery codes can expire. If your recovery code has expired, you can request a new one by following instructions above
# Topbar
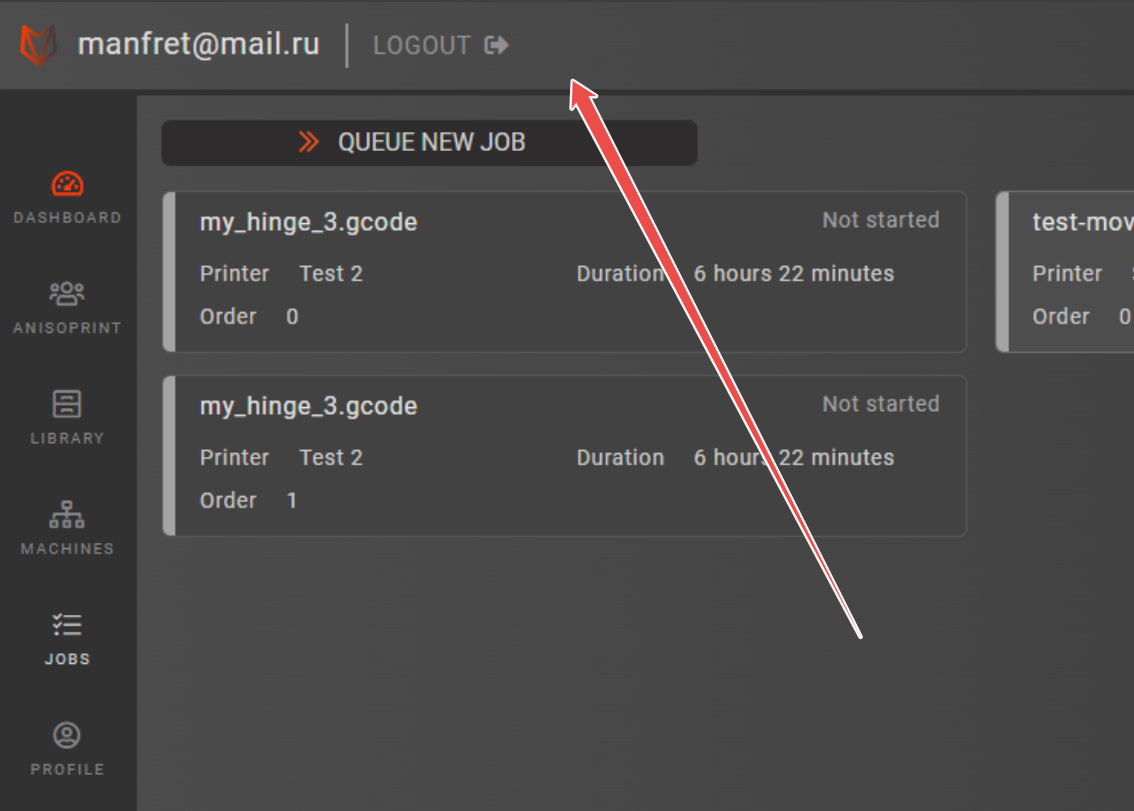
The static upper part of Aura.Connect is called a Topbar. Here you will be able to see your account's email, and logout.
# Logout
To logout click the 'Logout' button, which is located after your email in the Topbar
# Navbar
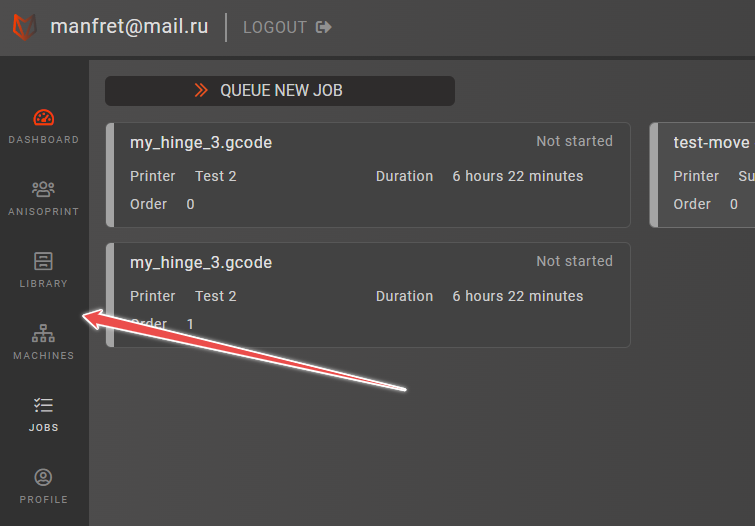
The static left hand side part of Aura.Connect is called a Navbar. It contains all of the sections of Aura.Connect, which are available to your account
TIP
Different account types in Aura.Connect have different section of Aura.Connect available to them. See Account types for more information
Let's go over each of the sections in more detail below
# Dashboard
Navigate to the Dashboard screen by clicking the 'Dashboard' button located in the Navbar
The dashboard section is often used as a quick summary of your company's statistics and for monitoring the current state of your printers.
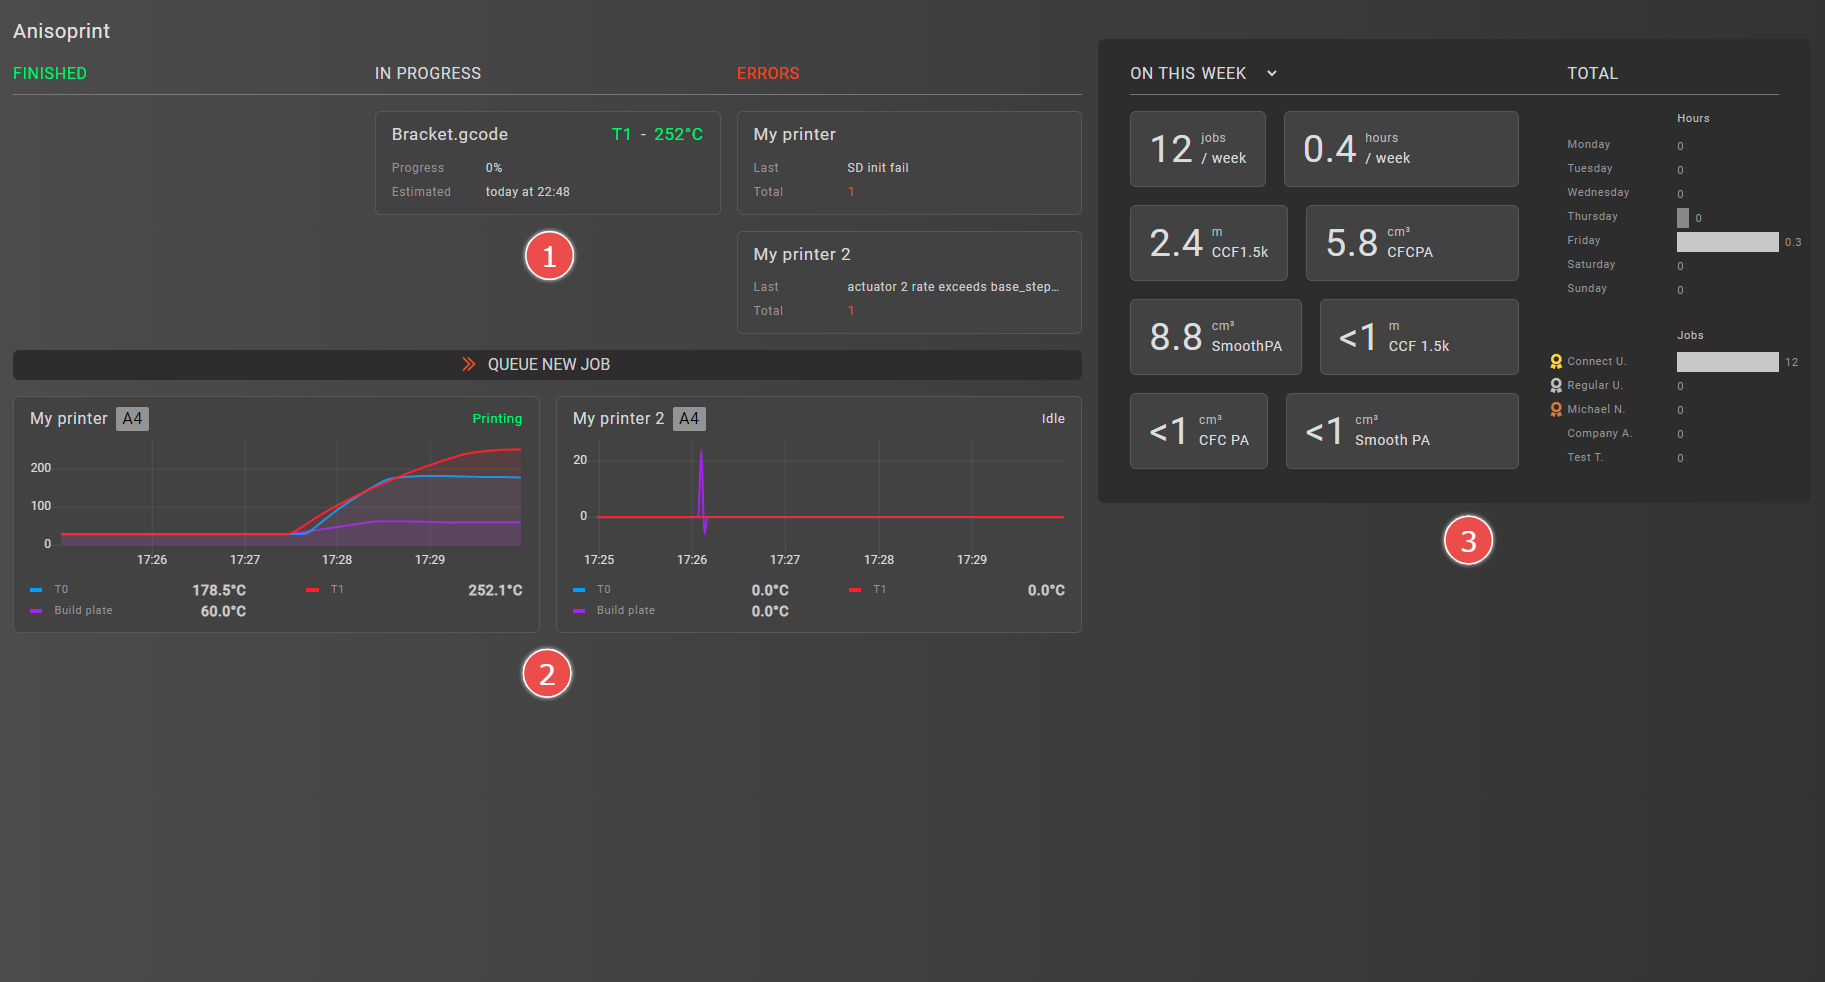
Dashboard is split into three main parts, listed below:
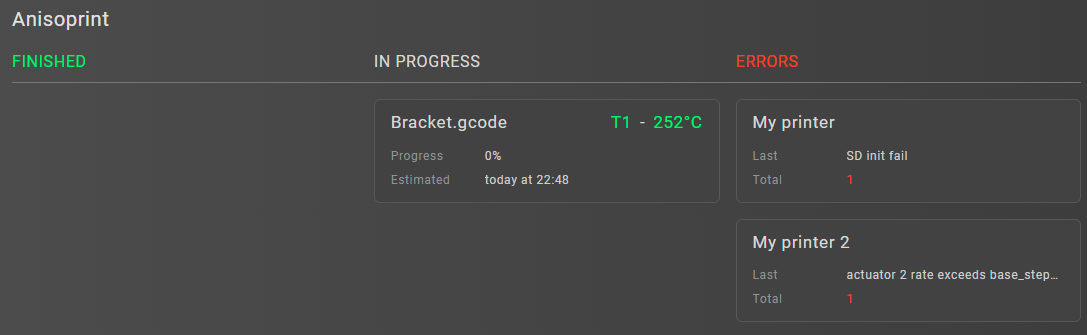
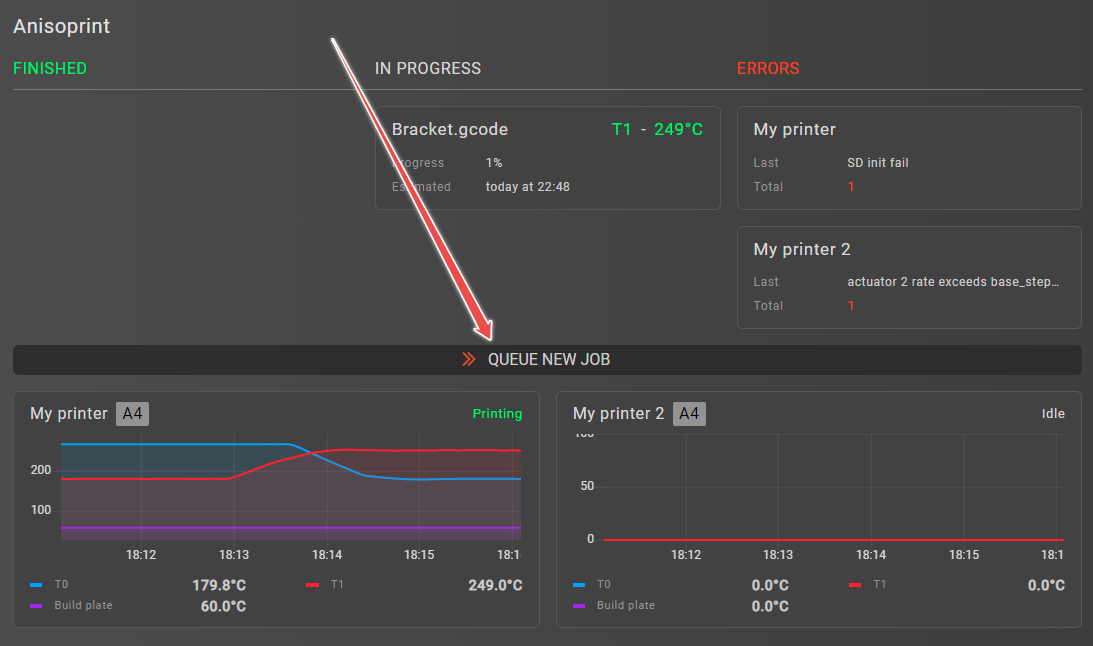
# Printer summary
Shows the current state of printers added to your company is Aura.Connect. There are 3 groups the printers are split into, they include:
- Finished
- Shows all the printers that have finished printing and need a confirmation from the user on their screen
- In progress
- Shows all the printer that are currently printing
- For each printing printer you will see
- G-Code file name, that's currently being printer
- Overall printing progress in percents, ranging from 0% to 100%
- Current tool being used by the printer, and that tool's temperature
- Errors
- Shows all the printes that have unacknowledged errors, and the last error that the printer has sent out
# Printer telemetry summary
Is consisted of printer cards, each printer card shows:
- Telemetry data over the last 5 minutes (for connected printers only)
- Printer state in the upper right corner
- Printer name
- Printer model
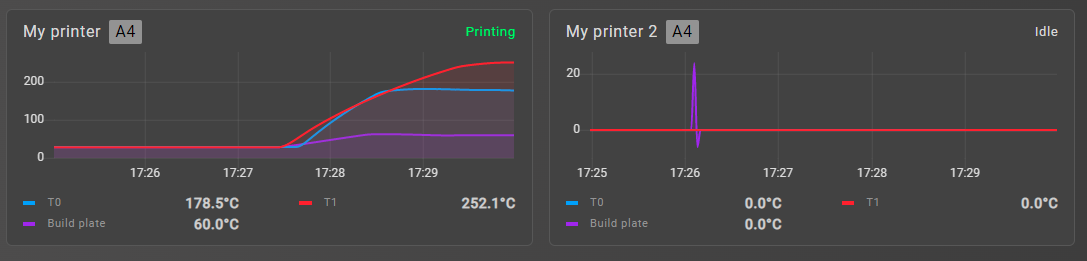
TIP
You can hover your mouse cursor over the plotting area to study telemetry data in more detail
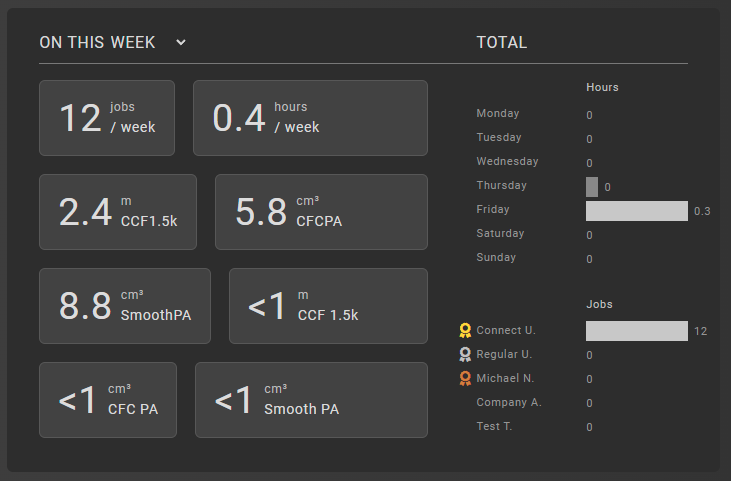
# Company statistics summary
Shows a quick summary of statistics in your company. These statistics include:
Statistics for a period
- Jobs finished
- Print hours
- Material consumptions for each material
Statistics overall
- Printing hours by weekday
- Jobs by user
Additionally, you can queue a new printing job using the Job queue wizard by clicking the 'Queue new job' button
If you haven't added any printers in Aura.Connect yet, you will see a 'Add new machine' button instead of the 'Queue new job' button
# Company
Navigate to the Company screen by clicking the 'Company' button located in the Navbar
The company section contains information about all the users in the company. If you're a company admin you are also able to change information about the company, add new users, add other users to company admins.
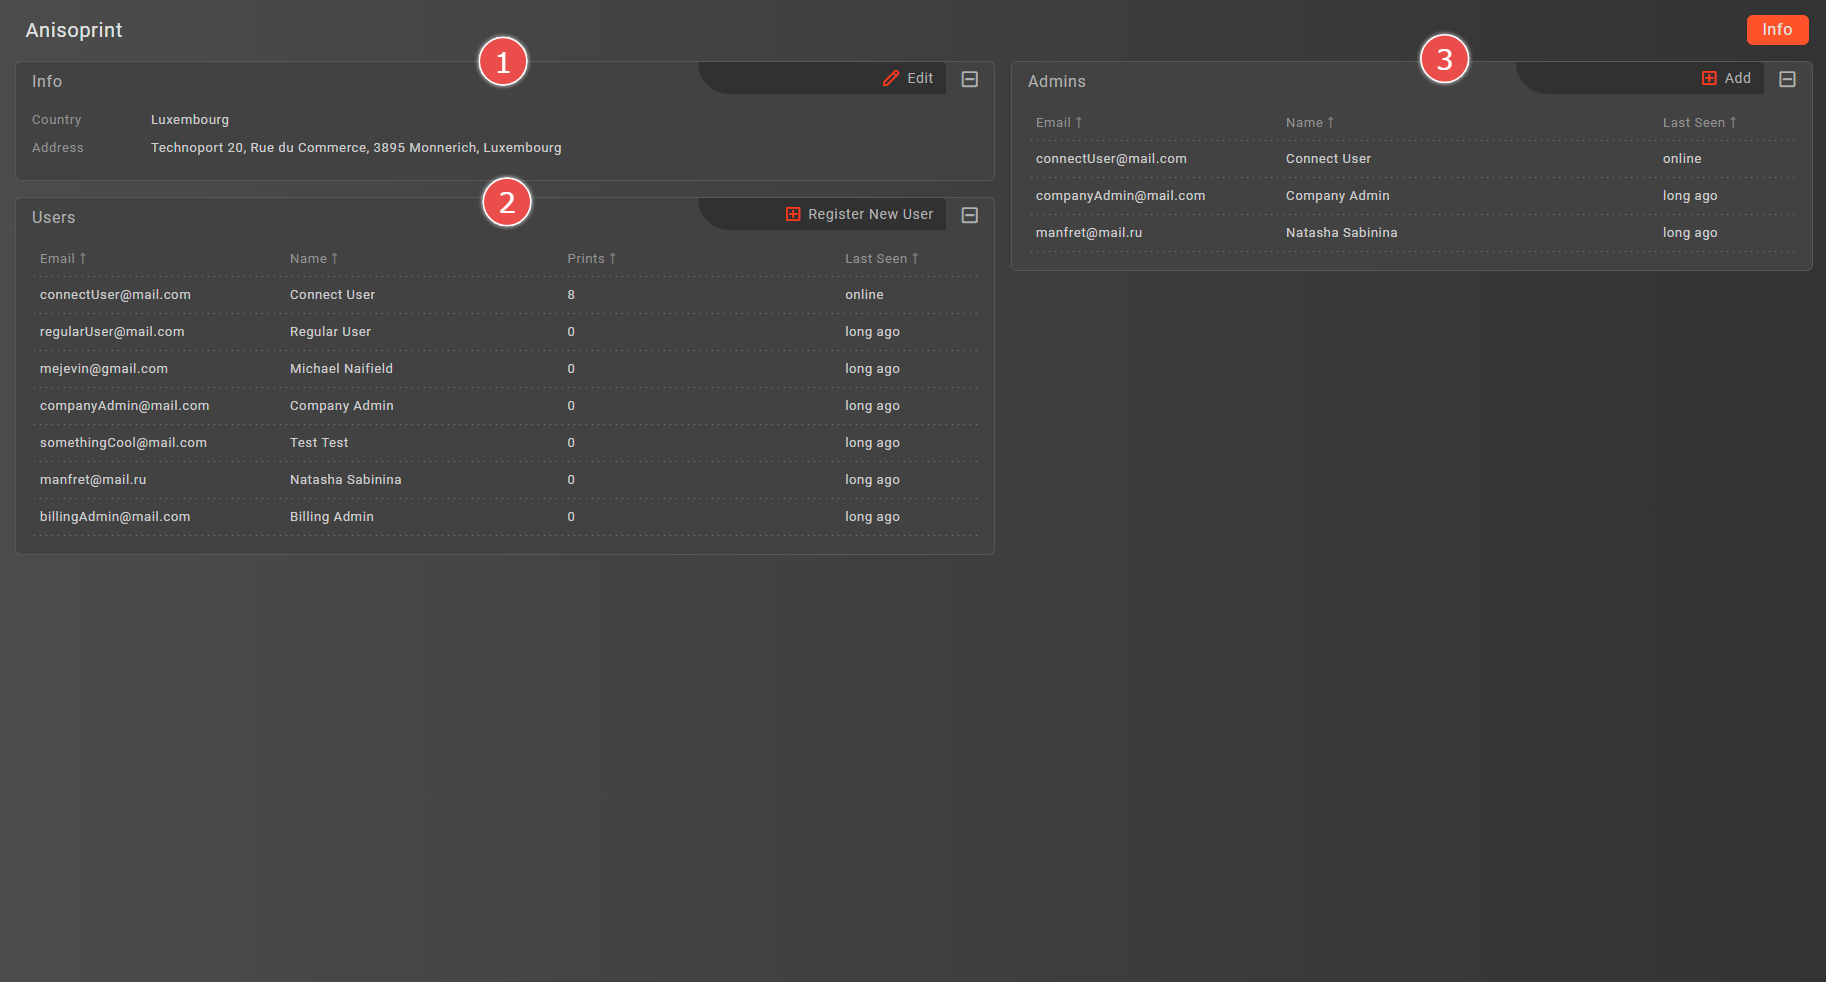
This section is split into three main parts listed below:
# Info panel
In the upper left part you will see the Info panel

Here you will see your company's country and address
# Users panel
In the lower left part you will see the Users panel
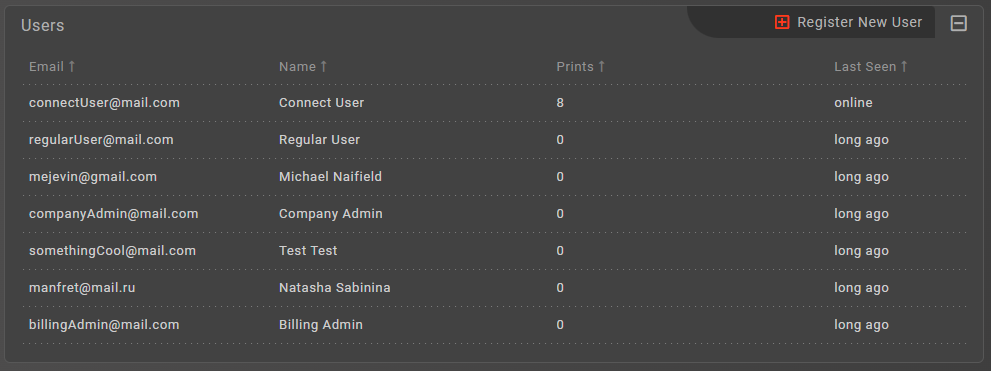
Here you will see a list of all users registered in your company
Hover over a user and click on the trash icon on the right to remove a user from your company
# Admins panel
In the upper right part you will see the Admins panel
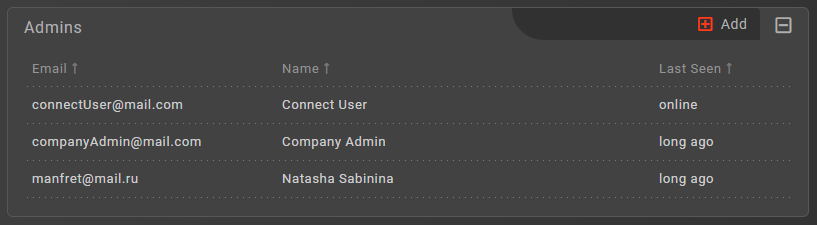
Here you will see a list of all users which have been made admins in your company
Hover over a user and click on the trash icon on the right to deprive them of admin rights in your company
# Company info form
To edit company information press the 'Edit' button in the Info panel, a form on the right will appear
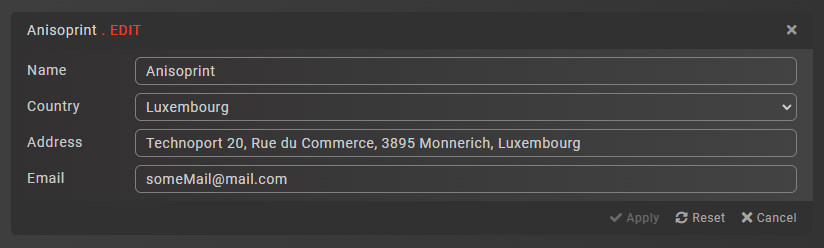
Press the 'Apply' button after you've finished editing your company's information, this will save all of your changes to Aura.Connect
Press the 'Reset' button if you wish to revert all the changes made to your company's information
Press the 'Cancel' button or a close button in the top right corner of the form to close the form
# Add user form
To add a new user to your copmpany press the 'Register new user' button in the Users, a form on the right will appear
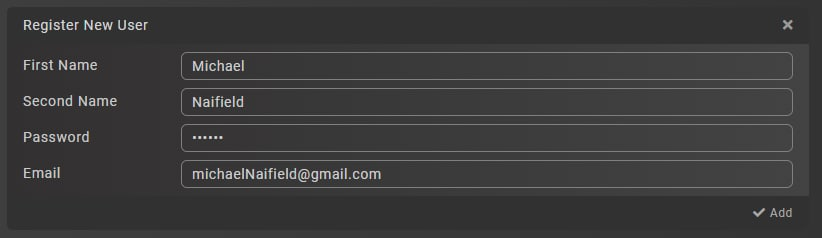
Press the 'Add' button after you've entered all the necesary user information to add a new user to your company
Press the close button in the top right corner of the form to close the form
# Add admin dialog
To add a new admin to your company press the 'Add' button in the Admins panel, a dialog will appear

Click on the user you want to make an admin to make them your company's admin
# Library
Navigate to the Library screen by clicking the 'Library' button located in the Navbar
The library section contains all the files uploaded to Aura.Connect by your company. You can also group your files into categories, upload new files, delete uploaded files.
You will two panels in this section:
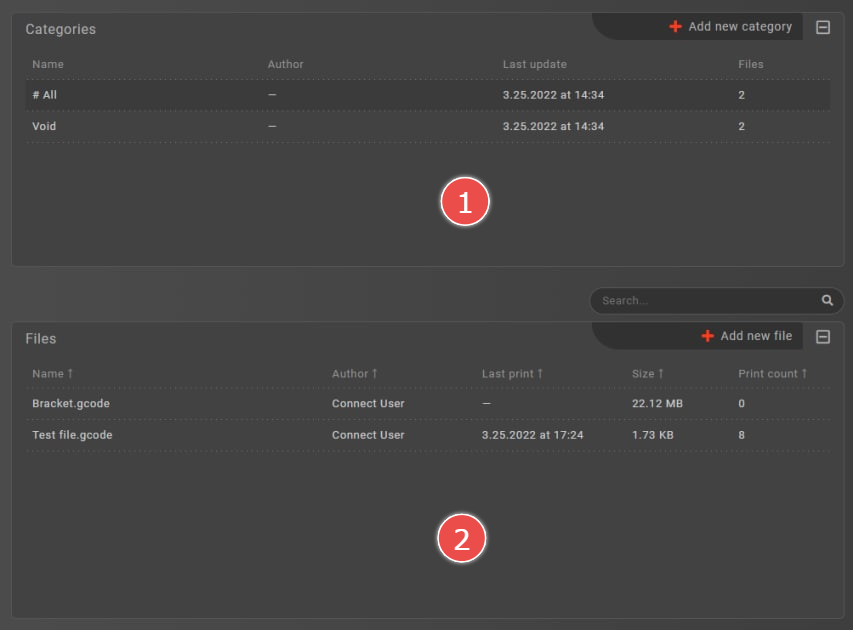
# Categories panel
In the upper left part you will see the Categories panel
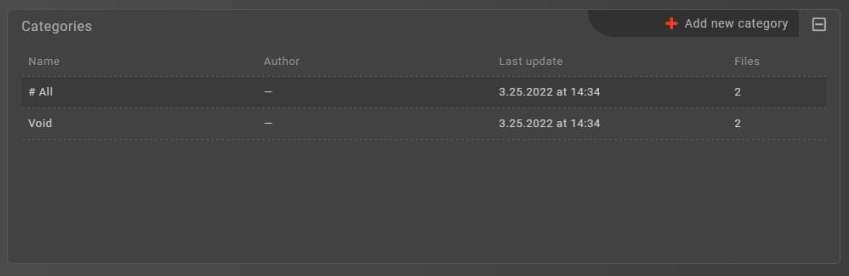
Here you will see a list of all categories added by users of your company
Hover over a category and click on the trash icon on the right to remove a category
Click on a category to filter the files by the selected category
TIP
There are two categories, which you cannot delete:
- #All - shows all files
- Void - show files with no category
# Files panel
In the lower left part you will see the Files panel
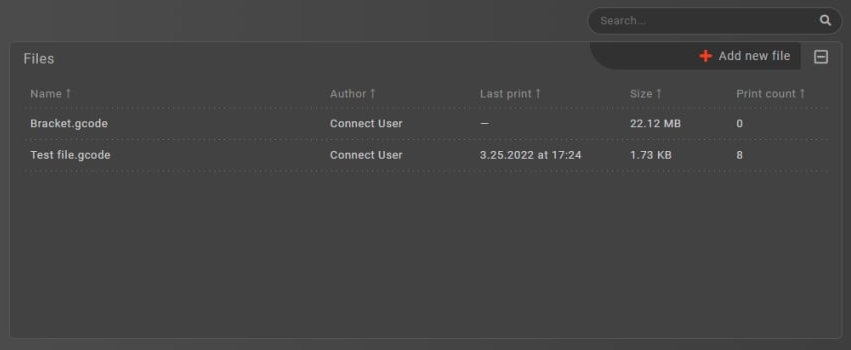
Here you will see a list of all files uploaded to Aura.Connect by users of your company
Hover over a file and click on the trash icon on the right to remove the file
Click on a file to inspect it
TIP
Use the search box if you have many files. The search is performed by the file's name
# Add category form
Click on the 'Add new category' button in the Categories panel to add a new category, a form on the right will appear

Enter the name of a new category and click the 'Add' button. A new category will appear in the Categories panel list. This category can now be used when uploading new files, or you can change the category of already existing files to it
# Add file form
Click on the 'Add new file' button in the Files panel to add a new file, a form on the right will appear
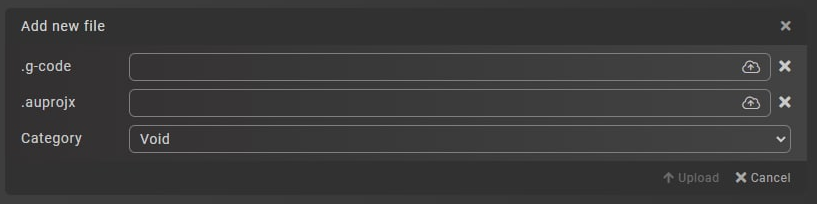
Drag and drop the desired .gcode file (and optionally an .auprojx file), select a category and click the 'Upload' button
TIP
You can also click on the cloud icon to browse for files on your PC
# File inspector
Click on one of the files in the Files panel to inspect it, a File inspector will appear on the right side of the screen
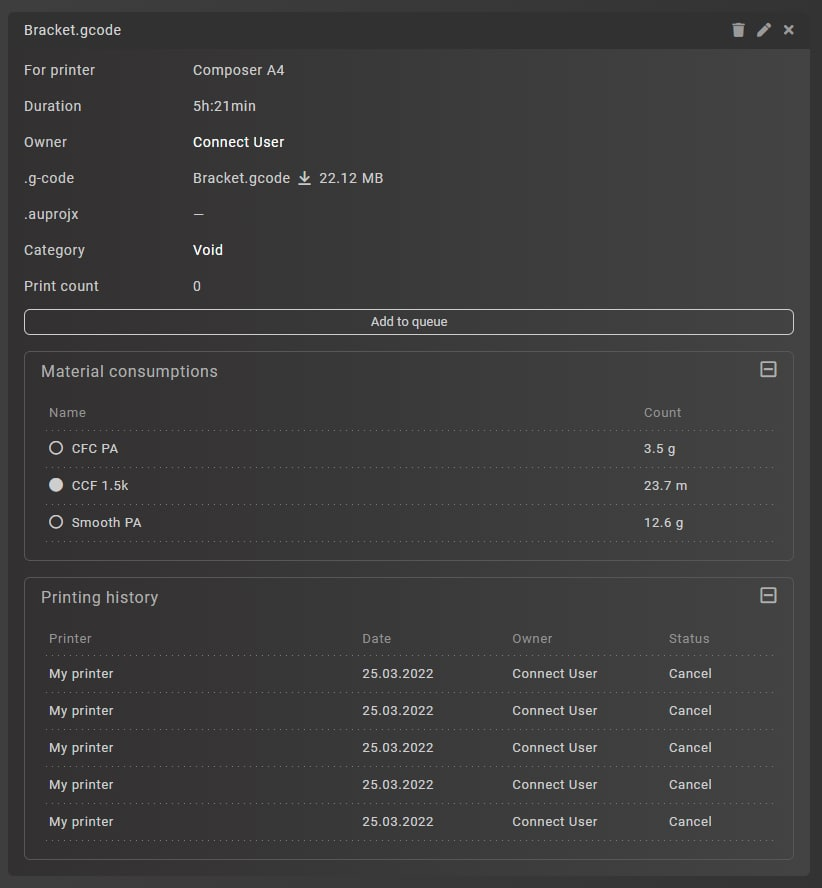
You will see all the information about a file, which is stored in Aura.Connect, including:
- Printer model, for which the file is designed for
- Duration for print
- User, who added the file
- .gcode file
- .auprojx file
- Category of the file
- Print count
WARNING
Only successfully finished prints increment the print count
The following actions may be performed in the File inspector:
- Delete the file by clicking on the trash icon in the top right
- Edit the file by clicking on the pen icon in the top right
- Add the file to a printer queue (via the printer selection dialog)
When editing a file, you can change its .gcode, .auprojx, by drag and dropping the files from your PC, or by clicking on the cloud icon. Additionally, you can change its category
# Machines
Navigate to the Machines screen by clicking the 'Machine's button located in the Navbar
The machines section contains all the printers added to your company. Each printer can be inspected in more detail via the Printer inspector
# Printer cards
In the left part of the Machines screen you will see a list of all printers added by your company in Aura.Connect. Each printer is represted as a Printer card
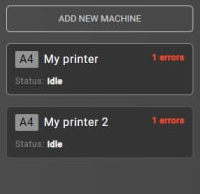
Each Printer card contains the following information:
- Printer model
- Printer name
- Status of the printer
- Unacknowledged errors of the printer
TIP
Hovering the error count will show the last error sent by printer
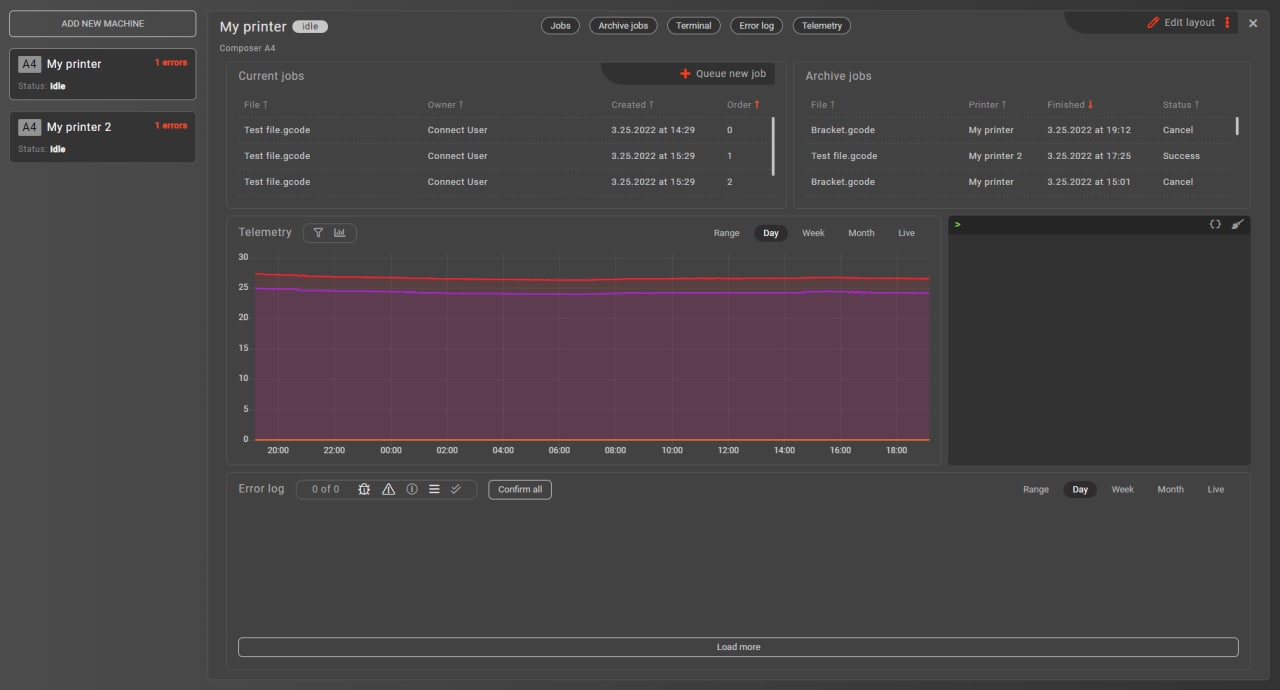
# Printer inspector
Click on one of the Printer cards in the list to inspect the printer, a Printer inspector will open
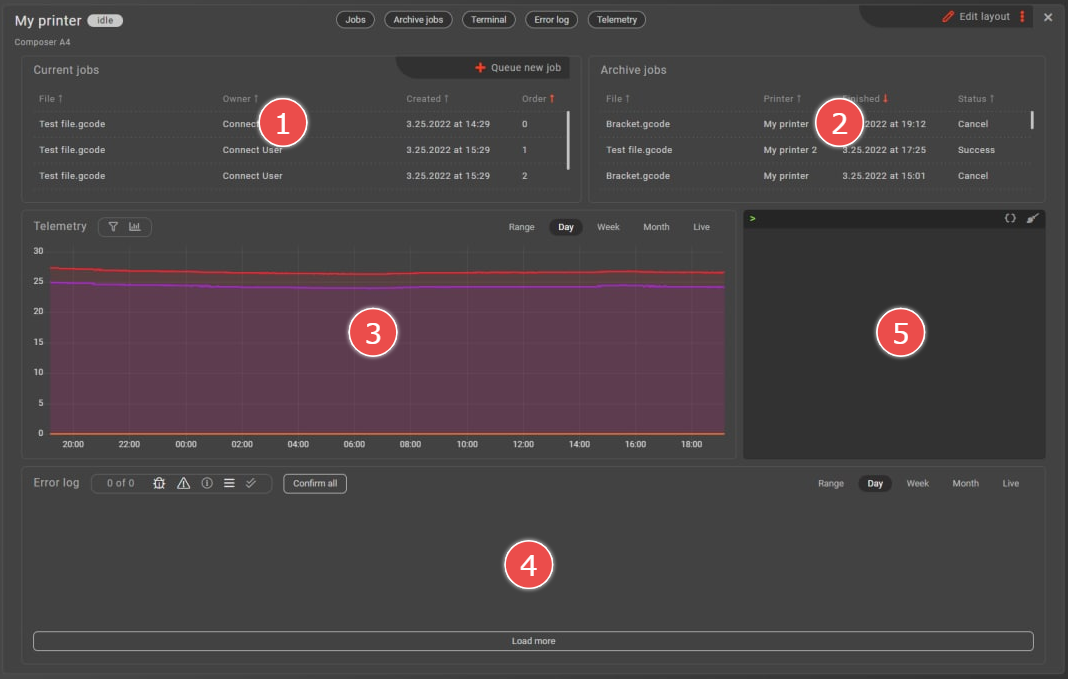
You will see a panel, that contains all of the information and interactive controls related to a printer. These controls include:
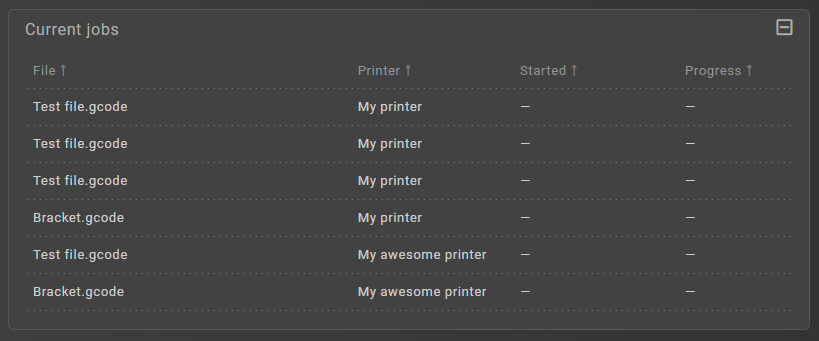
# Current jobs (informational & interactive control)
Shows all the jobs that are currently queued onto the selected printer
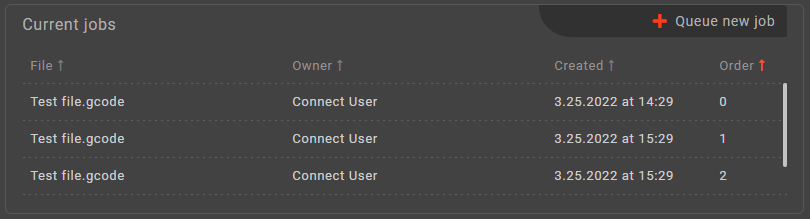
You can click on one of the jobs to view it in the Jobs section.
Also, you can queue a new job by clicking the 'Queue new job' button, this will open a Job queue wizard
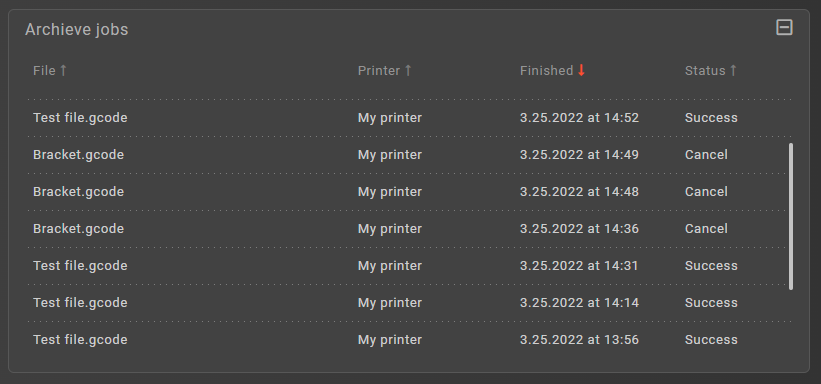
# Archive jobs (informational control)
Show all the jobs archives that are available on the selected printer
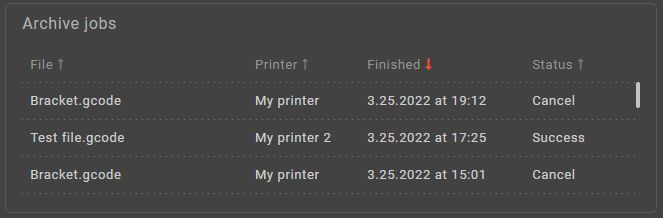
You can click on one of the archives to view it in the Jobs section
# Telemetry (informational control)
Shows the telemetry on the selected printer
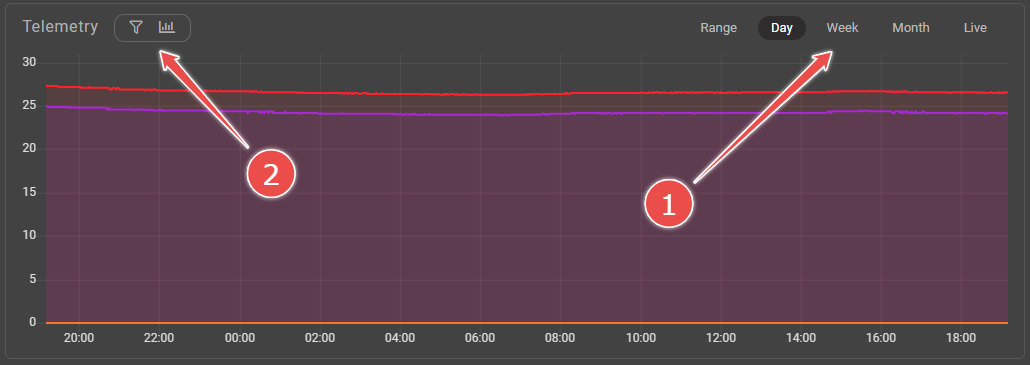
Change the period for which you're viewing the telemetry [1], and filter the telemetry by types and subtypes [2]
TIP
If you can't see the fitering switches, use the toggle buttons next to the 'Telemetry' title in the top left corner to toggle the visiblity of the filtering switches
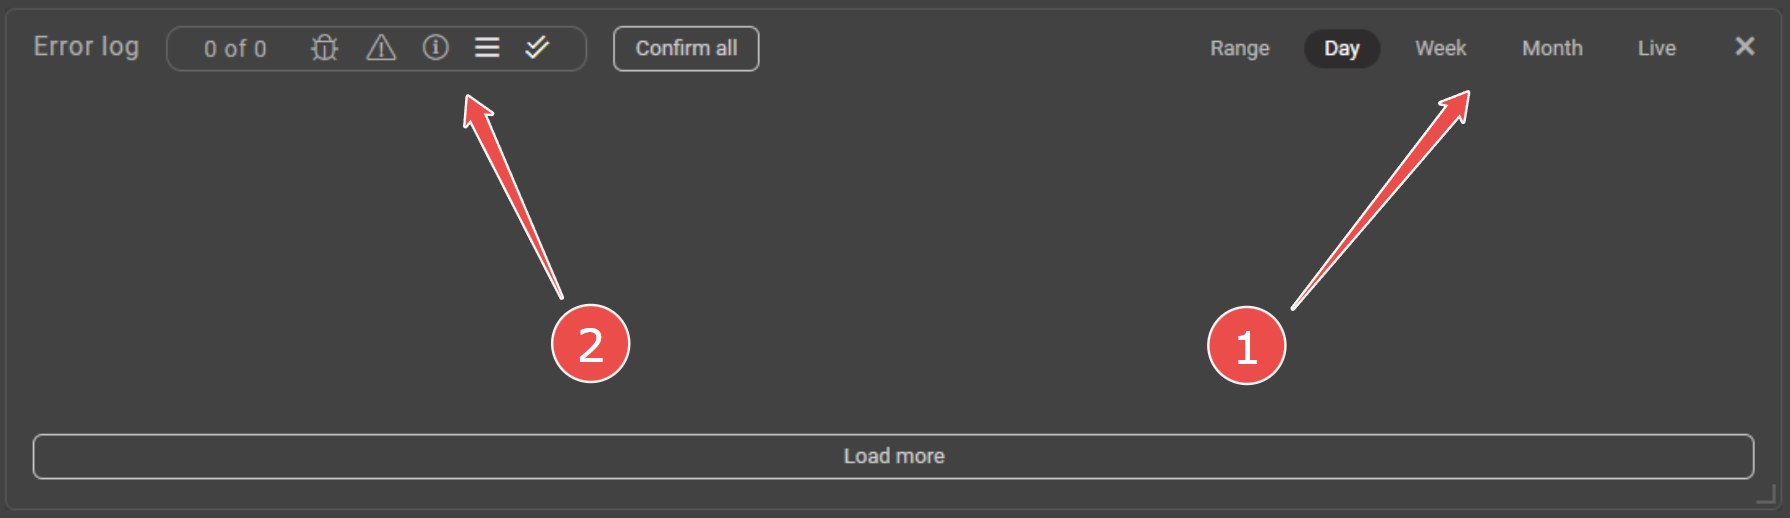
# Error log (informational control)
Show the different errors, warnings, and informational messages sent by a printer. You can also change the period for which you're viewing the errors [1], and filter the errors by their types [2]
# Terminal (interactive control)
Is used to send commands and view raw logs from the printer.

Type the command in the text field next to the green cursor, and press 'Enter' to send a command
WARNING
Sending command to printer while it's printing is dangerous, because commands won't be executed immideately! See Sending commands via Terminal mid print for more information
# Customize printer inspector
Printer inspector's layout may be customized. You can hide certain controls, resize them, move them, swap them (if they're the same size).
Press the 'Edit layout' button in the top right of the Printer inspector to enter the layout editing mode
After you're finished changing the layout, press the 'Save layout' button
Also, at the top, you will see buttons, which control the visibiity of certain controls. Toggle them on and off as you desire.
TIP
If you've really messed up the layout, resetting it is a quick and easy way to get a usable layout. Reset it by clicking the 'Reset view' button in the Additional printer inspector actions menu
# Additional printer inspector actions
Additionally, you can click the three dots button in the top right of the Printer inspector to:
- Update connection with the printer
- Delete printer
- Edit printer's name
- Reset view

WARNING
Only admins of your company may delete printers
# Printer info form
Click the 'Edit printer' button in the Additional printer inspector actions menu, a form in the bottom right corner of the Machines screen will appear
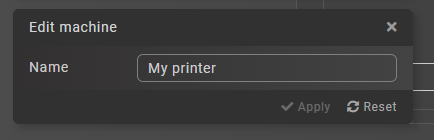
Here you can change the name of the printer
# Add new printer
WARNING
Only admins of your company may add new printer
Click the 'Add new machine' button at the top of the Printer list, a form in the bottom right corner of the Machines screen will appear
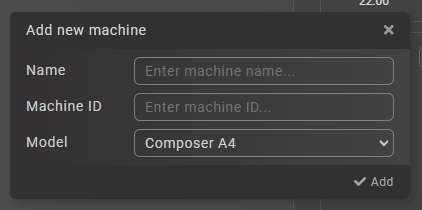
Here you can add a new printer to your company, by entering the name, selecting the model, and the Machine ID of the printer you're trying to add. After you've entered all the information, click the 'Add' button.
After some time, you will see a Connection Code for the printer appear
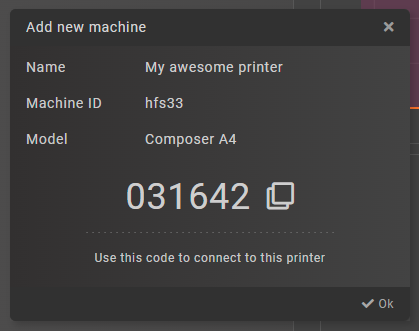
Use the code provided to you to connet to the newly added printer
Refer to the Establishing a connection article for more information
# Jobs
Navigate to the Jobs screen by clicking the 'Job's button located in the Navbar
The jobs section contains all of the jobs queued onto printers in your company. Here you may inspect the jobs, monitor their progress, delete, reorder, start, stop, and pause them.
There are two tabs available in this screen
- Current
- Shows all the jobs that are currently available to interact with
- Archive
- Shows all the arhives created from jobs that were finished or cancelled
Switch between tabs, by clicking the buttons located in the upper right corner of the screen
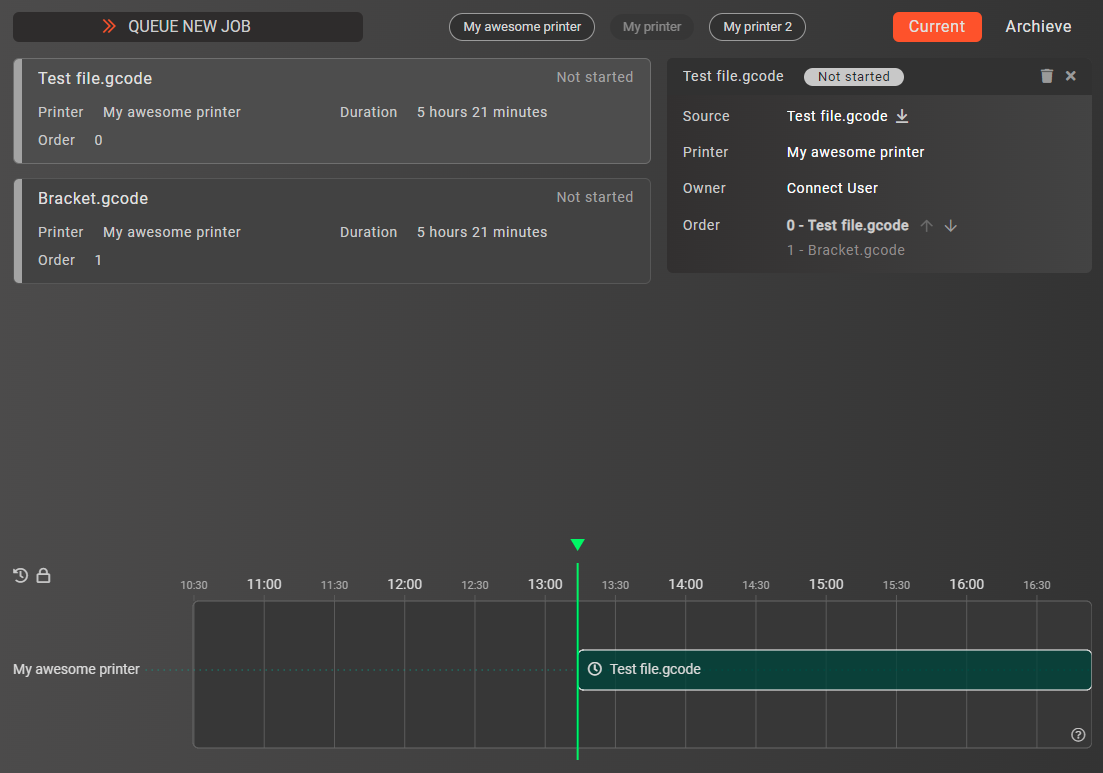
# Job cards
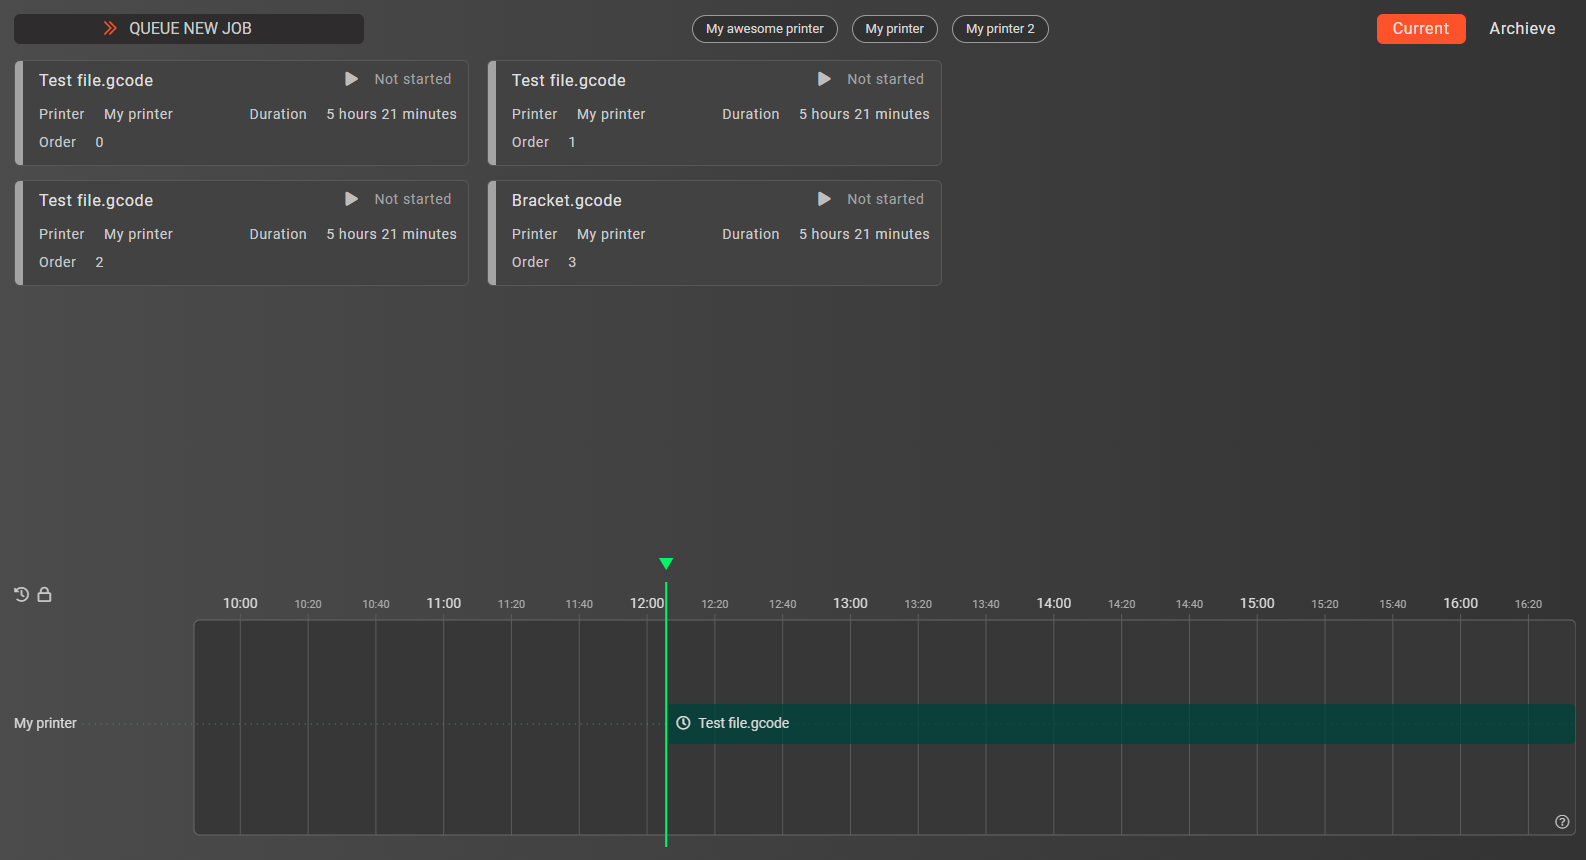
In the Current tab, in the upper left part you will see Job cards for each job queued by your company
Each card has the following information:
- Printer name (for which it is queued)
- Order on the printer (each printer has its own queue)
- Duration, if available
- Progress, if the job is started
- Estimated time of finish, if the job is started
- Job status in the upper right corner
Additionally, next to the Job status, you will see buttons which control the state of the job. Use these buttons to:
- Start the job
- Pause the job
- Stop the job
# Job inspector
Click on one of the Job cards to inspect the job in more detail, a Job inspector will appear on the right side of the screen
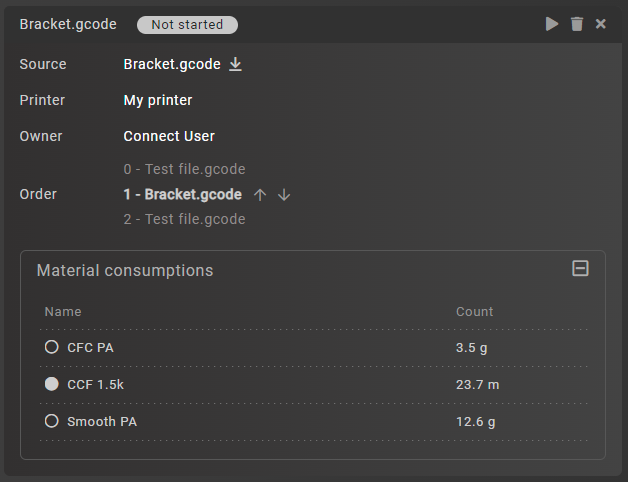
Here you will see all the information about a job, including:
- Name of .gcode file contained in the file attached to a job
- Status of the job
- Source
- A file attached to a job, which contains .gcode that is going to be printed
- Printer
- A printer, to which the job has been assigned to
- Owner
- A user, which cread the job
- Order
- Order of the job on a particular printer
- Material consumptions
- Calculated consumptions of different materials in grams for plastic and in meters for fiber
Additionally, in the upper right corner you can:
- Start the job
- Pause the job
- Stop the job
- Delete the job
TIP
Use the arrow buttons to change the order of the job on the printer
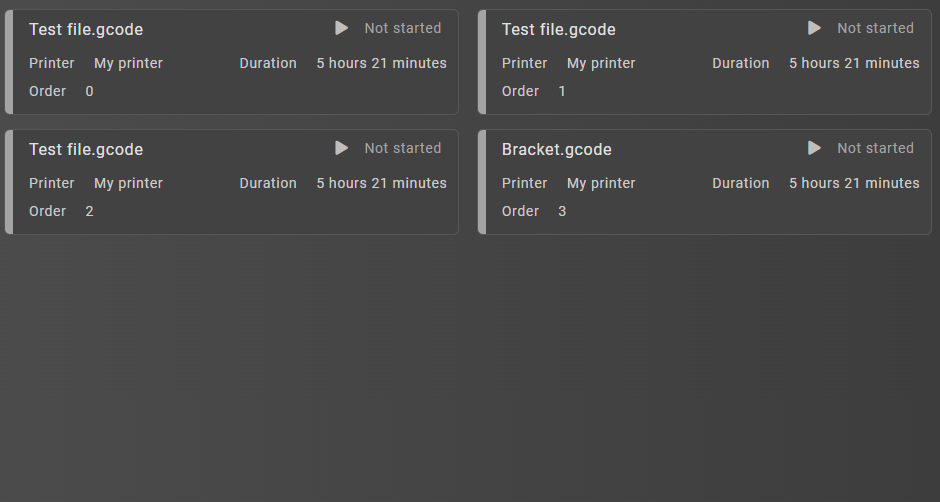
# Job timeline
In the lower part of the Jobs screen you will see a timeline with all jobs queued for different printers
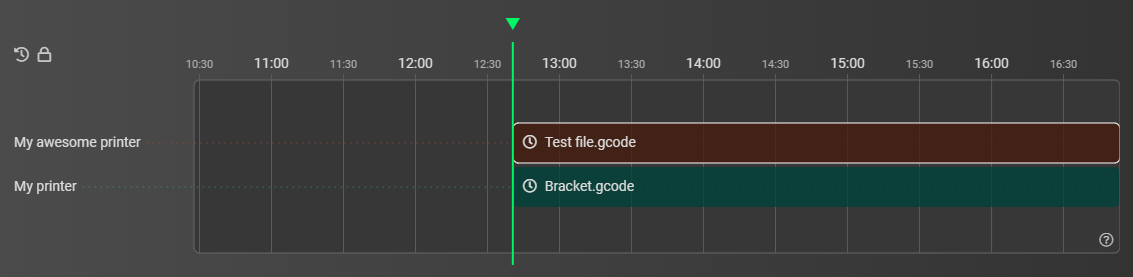
Here you will see the jobs that were queued onto printers in the order, that has been assigned to them. If a job has a known duration time, it will be displayed correctly chronologically. If the job's duration is not available it will be displayed as a fading rectangle.
Move along the timeline by holding down the left mouse button and moving your mouse.
Zoom in and out on the timeline using the mousewheel
Select a job on the timeline by left clicking on it. This will open the job in the Job inspector
Use the buttons in the top right part of the timeline to:
- Lock the timeline
- Locks the timeline and follows the current time (greeen line) automatically
- Reset the timeline
- Resets the zoom and position on the timeline to the default value
# Queue a new job
Press the 'Queue new job' button in the upper left part of the Jobs screen white on the 'Current' tab, this will open a Job queue wizard dialog. This dialog has two steps, which you have to complete to queue a job, these steps are described below
# Selecting a printer for a new job
First, you need to select a printer to which this job will be assigned. Do so by clicking on the printer in the list.
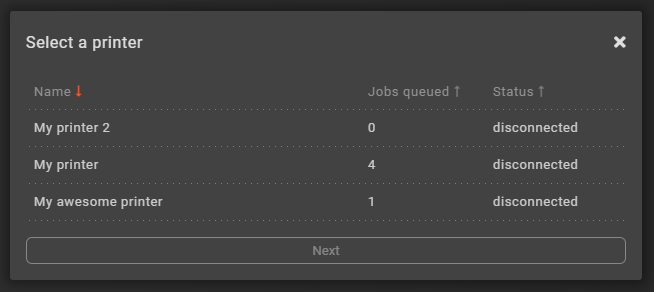
After the printer is selected the 'Next' button will become available, click it to go to the next step.
# Selecting a file for a new job
After you've successfully selected a printer, you will be prompted to select a file, which contains the .gcode you want to print in the new job. Select the desired file by clicking on it.
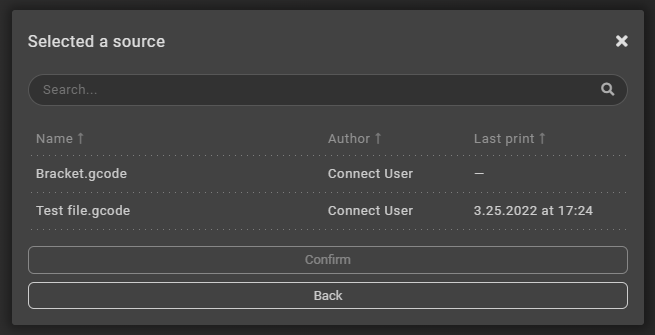
After the file is selected the 'Confirm' button will become avaialble. Click it and the job will now be queued on the printer you selected with the selected file
# Filter jobs by printer
In the upper middle part of the Jobs screen, you will see toggle buttons, that allow you to filter the jobs that are displayed by printers
Switch them on and off by clicking on them, if you wish to see jobs for certain printers only
# Archives panel
In the left part of the Jobs screen, while in the 'Archive's tab, you will see the Archives panel
Here you will see a list of all finished jobs in your company. We also refer to them as Job archives
# Archive inspector
Click on one of the job archives in the Archives panel to inspect them, an Archive inspector will appear on the right side

Here you will see the following information:
- .gcode file name, that was being priting
- Source
- A file that has been upload to Aura.Connect and is available in the Library
- Printer
- The printer that has been printing the job, which if avaialble in the Machiens section
- Owner
- The user who has created the job
Additionally, you can press the 'Print again' button to queue the same file onto the same printer
# Profile
Navigate to the Profile screen by clicking the 'Profile' button located in the Navbar
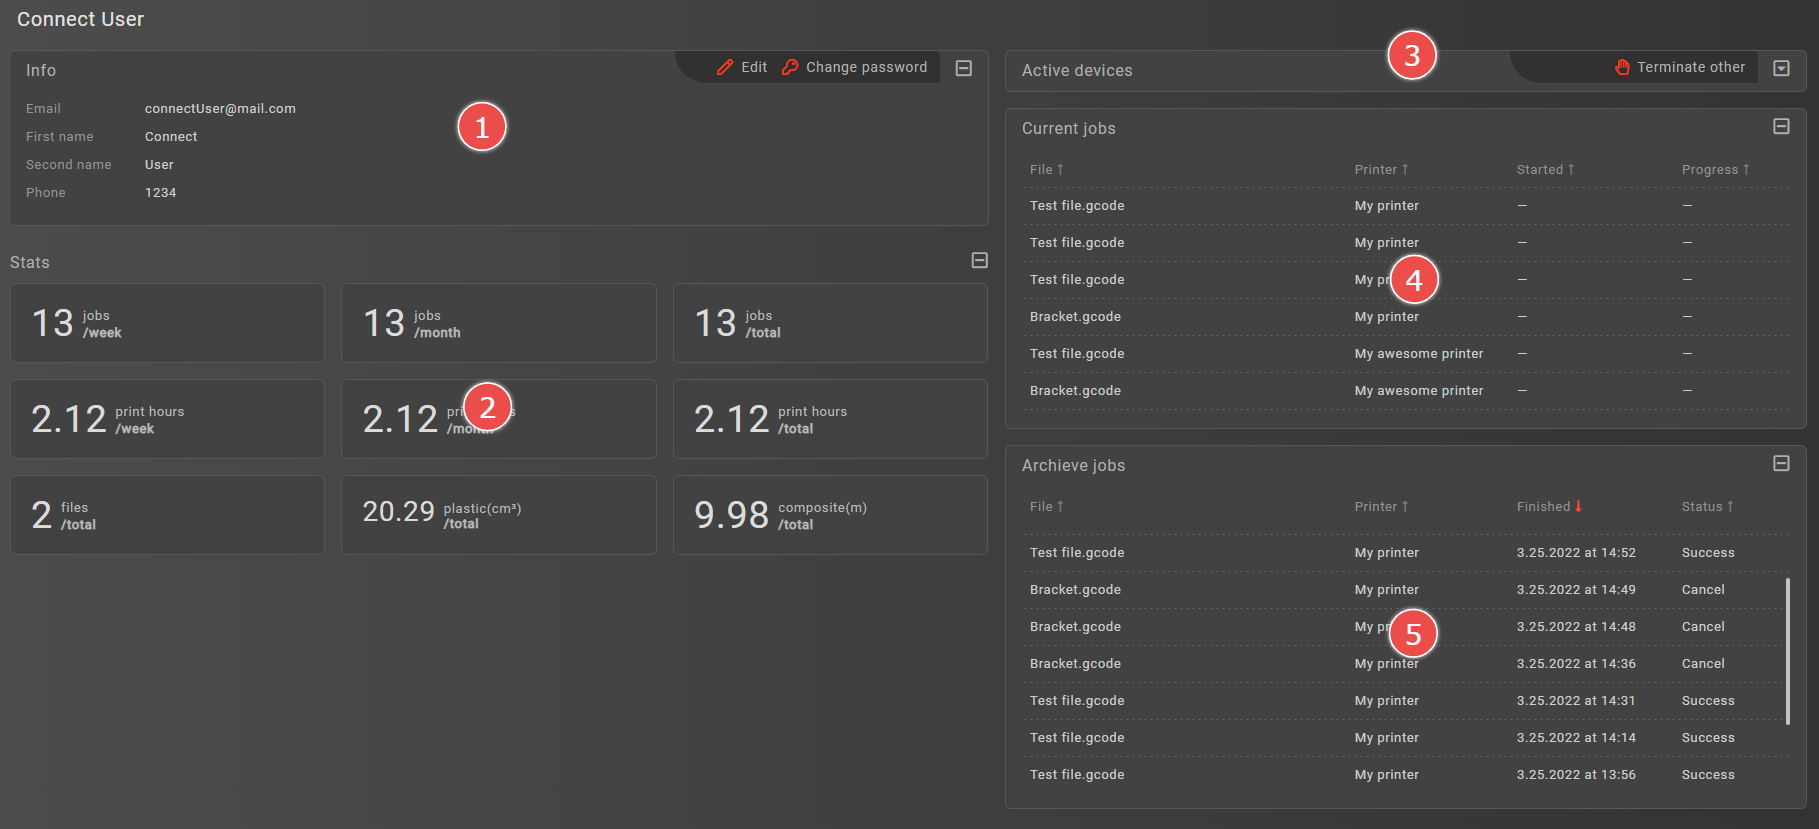
The profile section contains all the information about the user, their jobs, stats, archives, active devices. You can also change your password and profile information
Below is a list of all panels available on this section:
# Profile information panel
In the upper left part you will see the Profile information panel

As the name implies, this panel holds information about your profile, including:
- Your email
- First & Second names
- Phone number (if any)
# Profile statistics panel
In the lower left part you will se the Profile statistics panel
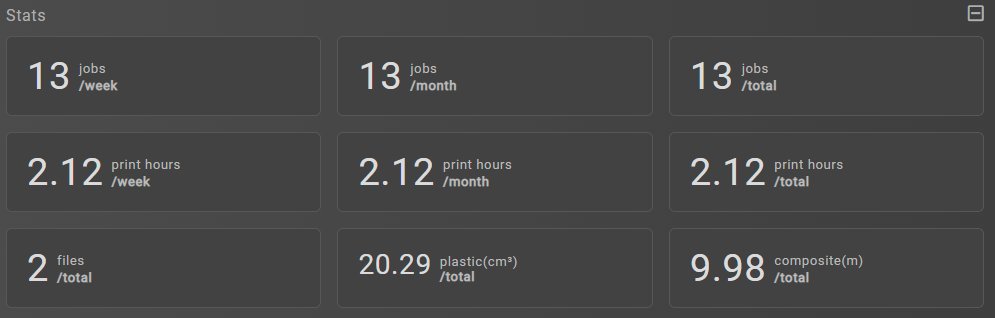
Profile statistics include:
- Amount of jobs finished
- Print hours
- Plastic consumption
- Composite consumption
You can monitor and analyze your activity using the information provided by this panel for different periods (e.g. weekly, monthly, total)
# Active devices panel
On the right the first panel from the top is the Active devices panel
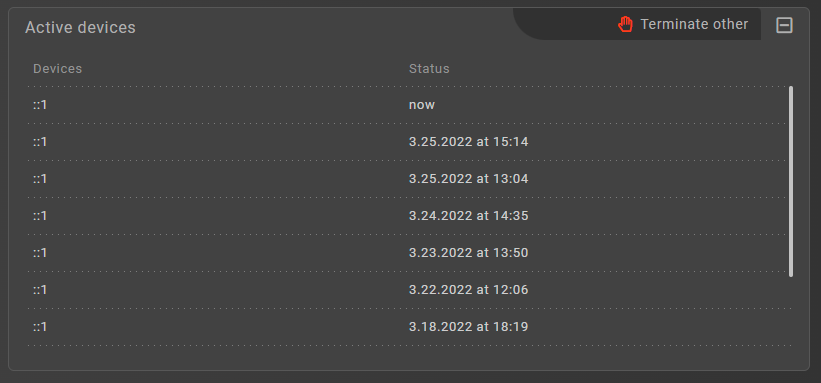
In this panel you will see a list of all devices (their IP addresses) which have been used to log into your account
# Profile jobs panel
On the right the second panel from the top is the Profile jobs panel
This panel contains a list of all jobs queued by you
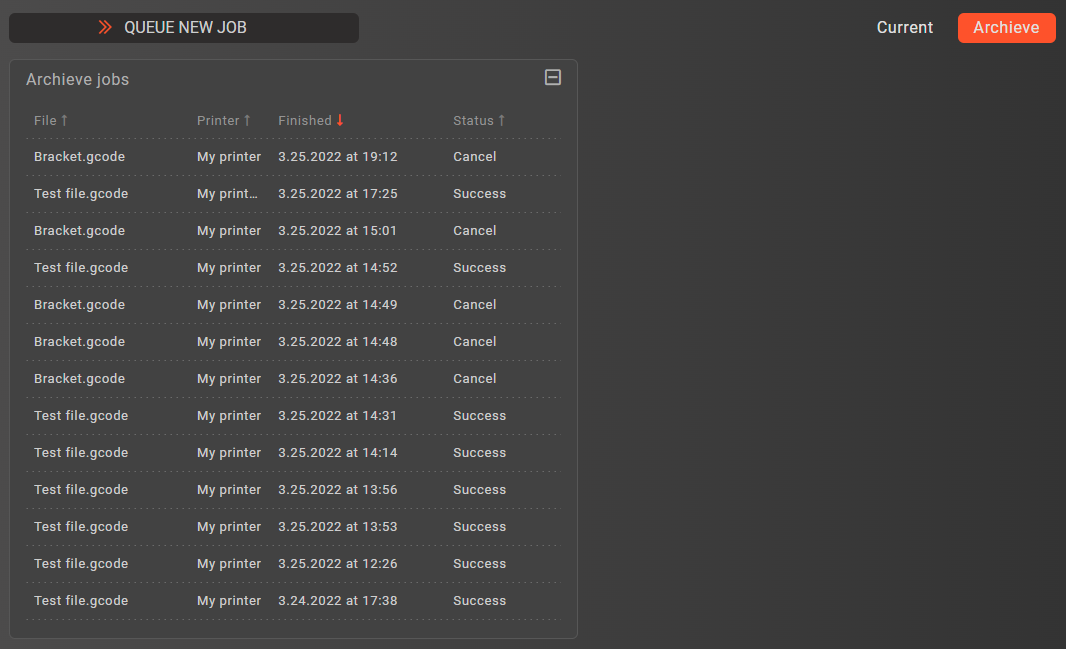
# Profile archives panel
On the right the third panel from the top is the Profile archives panel
This panel contains a list of all finished jobs by you
# Edit profile form
Click on the 'Edit' button in the Profile information panel, on the right you will see the Edit profile form
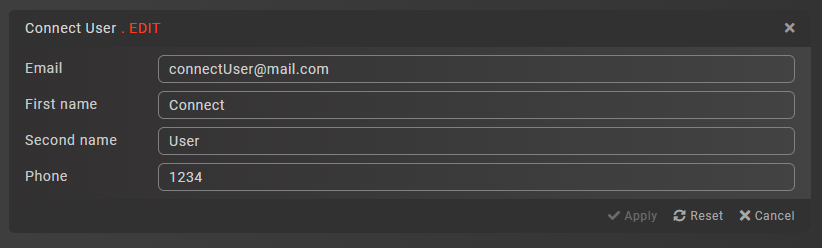
Here you can change information about you profile, including:
- Your email
- First & Second names
- Phone
# Change password form
Click on the 'Change password' button in the Profile information panel, on the right you will see the Change password form
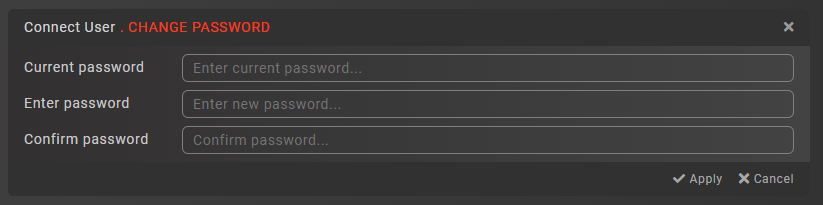
This form allows you to change your passoword