# Aura CLI premiumopen
Aura.CLI can be used if you have Aura.OPEN license with Premium features enabled.
Beta version of Aura CLI is included in Aura 2.1 and later. Aura.CLI.exe is located in the Aura program directory.
# Usage
Generate g-code for model:
aura.cli --center --models part.stl --output part.gcode --session settings.aus.json
Generate g-code for several models:
aura.cli --models part.stl part2.stp --output part.gcode --session settings.aus.json
Generate g-code with custom layup rules for parts:
aura.cli --input parts-data.json --output part.gcode --session settings.aus.json
Session file includes profile, printer and materials settings. Use File->Export session... in Aura to save session file with current slicing settings. Session file has JSON format.
# Parameters
| Parameter | Description |
|---|---|
| -m, --models | (Group: parts) Model files to slice, several filenames should be separated by spaces. |
| -i, --input | (Group: parts) Input data file with information about models and layups in JSON format. |
| -s, --session | Required. Session file with slicing settings in JSON format. |
| -o, --output | Required. Output file. |
| -c, --center | In case of single part put it to the center of the buildplate. |
| -f, --force | Overwrite existing output file. |
| --help | Display help screen. |
| --version | Display version information. |
# Json input format
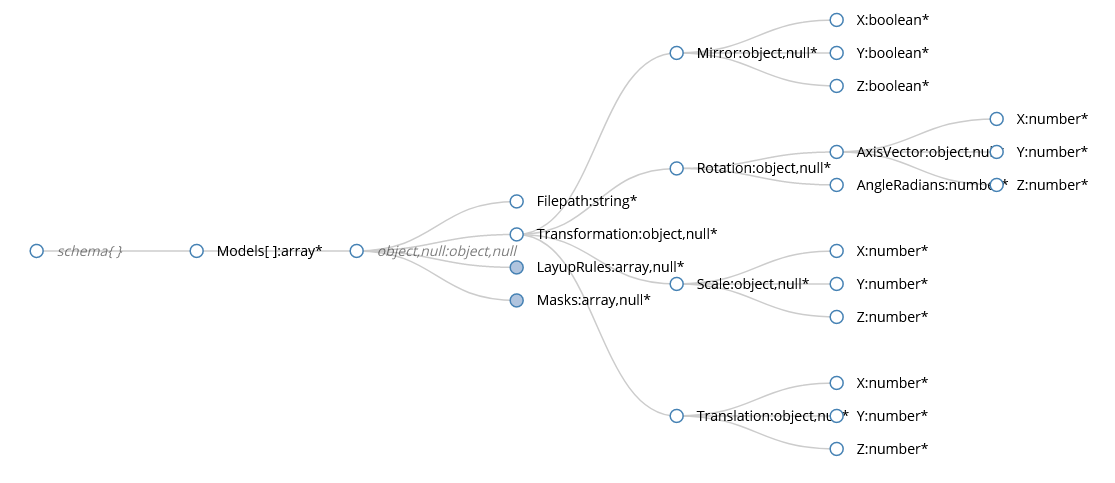
You can specify a list of models with layup regions and transformations using --input parameter. The JSON Schema for the input file can be found in cli-inputfile.schema.json, which is located in the Aura program directory.
The JSON file should containd an array of models. For each model the path to model file should be specified. Also, a transformation (translation, rotation, etc) can be set for the model to position it on the buildplate.

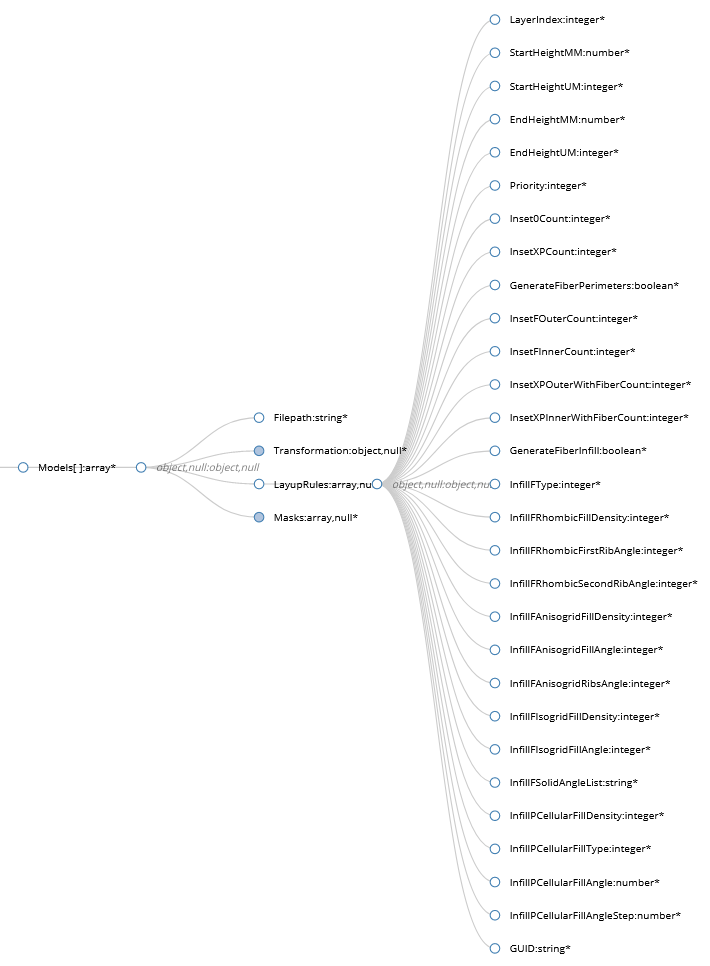
Optionally, each part can include custom part structure parameters for the different layers of the part (Layup Rules)

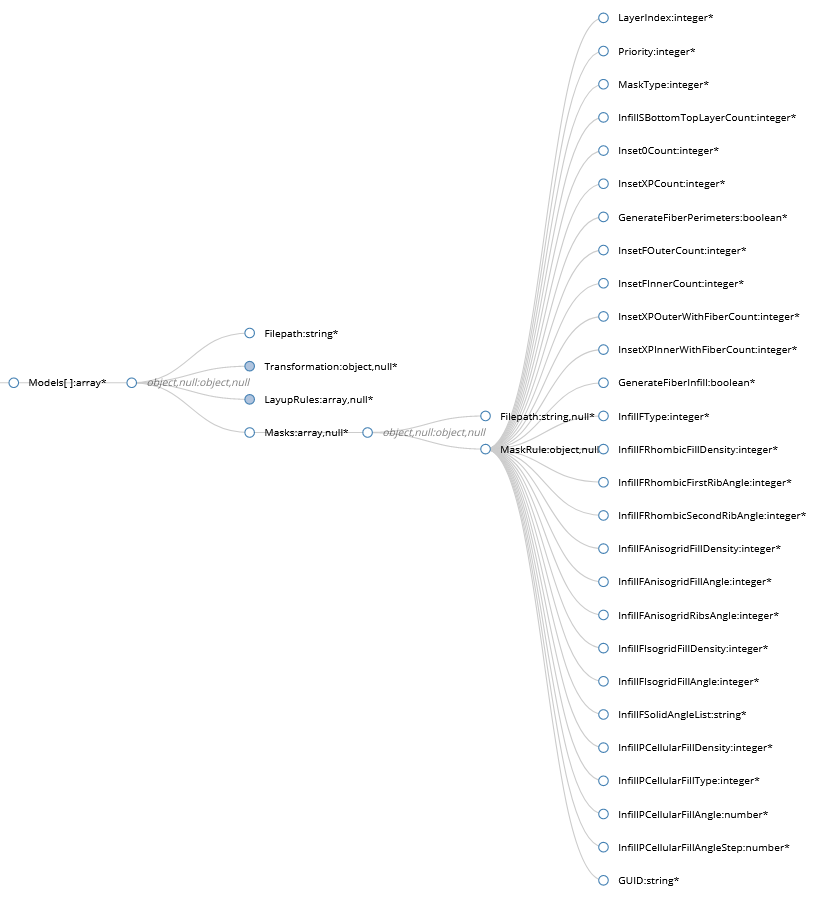
As an alternative, each part can include masks. If the input file contains both masks and layup rules, only masks will be used.

# Example
Load two models and rotate and place them on the buildplate
{
    "Models":
    [
        {
            "Filepath": "spool-axis.stp",
            "Transformation": {
                "Rotation": {
                    "AxisVector": { "X":0, "Y":0, "Z":1 },
                    "AngleRadians": 1.57075
                },
                "Translation": {
                    "X":150, "Y":100
                }
            }
        },
        {
            "Filepath": "spool-axis.stp",
            "Transformation": {
                "Rotation": {
                    "AxisVector": { "X":0, "Y":0, "Z":1 },
                    "AngleRadians": 1.57075
                },
                "Translation": {
                    "X":300, "Y":100
                }
            }
        }
    ]
}
# Fiber infill types
| Value | Type |
|---|---|
| 0 | SOLID |
| 1 | CELLULAR_RHOMBIC |
| 2 | CELLULAR_ISOGRID |
| 3 | CELLULAR_ANISOGRID |
# Cellular infill types
| Value | Type |
|---|---|
| 0 | LINE |
| 1 | GRID |
| 2 | TRIANGLES |
| 3 | ZIGZAG |
